Today I am simply going to go over decorating tips, not how to make your house or recipes, but more how to have your house not fall apart and cut the frustration in half. In many discussions I learned most people tried it once and had bad results so never went back. I am here to show you that I am not a cake decorator, my house is messy at best but all the stuff is stuck to it and it is standing.
I am starting with a cheap ten buck kit, the kind you can find at any grocery store, I got this one at the dollar store, a box of nilla wafers for the roof (not needed) some pseudo rope style licorice and some fruit stripe gum. Last two items also not needed but I stylistically like them building wise. Scissors and I also use tape and a board later not shown here.

Opening the kit it comes with walls, frosting and candy. Thankfully the tray has built in cups to dump the candy into. When I was a kid and we did this at home with my mom she always broke out a muffin pan for us to dump and sort candy into. I also start by laying down a towel since icing is sticky and later turns to glue.

So the first thing I am going to tell you is that for your own sanity the best way to decorate a gingerbread house is to do it backwards. I do not assemble mine until most of my decorating is finished.
Why? I learned awhile ago to quit fighting gravity, gravity will win. I have glued candy to things to watch it slide down the side of my house countless times so I build each panel laying flat first and let them dry way before I assemble the thing.
Why? I learned awhile ago to quit fighting gravity, gravity will win. I have glued candy to things to watch it slide down the side of my house countless times so I build each panel laying flat first and let them dry way before I assemble the thing.
So I am starting with my cookie roof, bad of icing, cookie, repeat.

then I shift it half a space and continue to shingle it
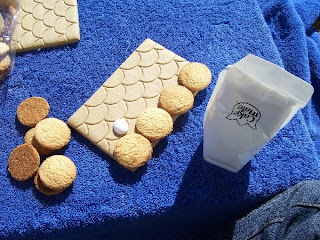
done, now I set these way out of the way and allow them to fully set while I work on the rest

First I start by readying any candy I want to use, gum will be used for window shutters and doors, rips will be window molding, it all needs to be measured and cut up before I begin just to make the whole process go smoothly

Then I run a bead of icing where I want to stick candy

and stick on candy, I used a bit too much icing but oh well
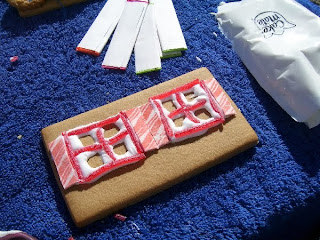
doors will take two pieces of gum so I line up the fruit stripe pattern then fold off and cut away the excess

then I lined them with a bead if icing for fun and added icing dots for door knobs

Next I take a bunch of these green rips and cut them off at half inch pieces and cut a little fringe into it instead of ripping them all the way apart, I am using these for fake grass
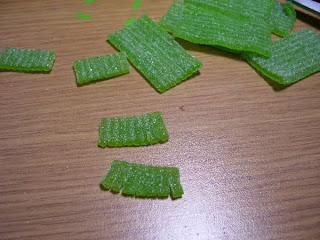
fake grass and flowers, I think I am done playing with the sides so I set everything aside to set for awhile, at least 30 minutes.
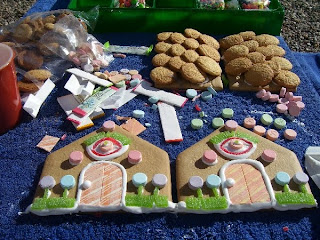
I went and made a fresh pot of coffee, got a board and tape and set it all on a solid flat surface. I can leave the house on while it sets once I assemble it out of the range of a gingerbread loving dog.

Now this kit came with a base to assemble the house on to but it looked really flimsy to me hence why I went and got a board and some tape. My mom often would wrap the piece of wood in christmas paper just to jazz it up more but I do not have any so we are going without it. So I cut the base from the rest of the candy cups and tape it to my board base.
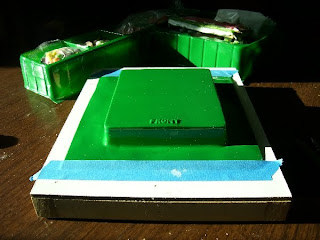
The rest of this I try to do as fast as possible, lay all the pieces flat, give them a good bead of icing on bottom and edges. I setup two walls at a time.

Then I tape the thing together but with the sticky side of the tape facing out so it does not pull all of my candy off when I take the tape off later. You might want an extra set of hands to do this. Then I also tension the walls on the inside with a piece of cardboard and set the house aside for another hour. Yes an hour. Why? My cookie roof is heavy, really heavy so the icing has to be fully set before I go anywhere near adding the roof.
Also icing is not like elmer's glue in the fact it does not change color, it will look the same glossy white dry as it does wet and just because the outside of your bead is set does not mean it is just hard coasted on the outside and still soft on the inside so just try not to touch it for at least 30 minutes.
Also icing is not like elmer's glue in the fact it does not change color, it will look the same glossy white dry as it does wet and just because the outside of your bead is set does not mean it is just hard coasted on the outside and still soft on the inside so just try not to touch it for at least 30 minutes.

ok roof time. And what you are about to see in the next frame may seem insane but it is actually the smartest thing ever and goes back to where I was in the beginning with the rule, Do Not Fight Gravity. So lay a good bead of icing on the sides of your roof where they are going to hit the walls, on this kit the roof only meets the front and back section.

Now because my house is fully dry I flip it over and position it on top of the section of roof where it needs to go and use the box to support the weight on the side holding it in the correct position.

Then while it is in this position I use an additional bead of icing to kind of caulk all of the edges on the inside. Then as usual in this project, go do something else for 30 minutes.

30 minutes later I run a bead all the way around the final roof panel then set the house down on top of it once again wedging an object under the side to make it lay flat on the roof panel, then once again you wait 30 more minutes

30 minutes later I finally flip it over and addon one last row of cookies to the very top

I then tried and failed at adding icicles to the eves and then called it done


Wenchkin is an amazing artist, specializing in muerto-inspired drawings, and thick black outlines. You can find her on Google+, on Facebook, or you can shop her ArtFire shop! She currently resides in Albuquerque with artist Scott Krichau, and their tripod Jack Russell "P."


 Brooke Heavey


Dayamn. You're awesome.
ReplyDeleteThat is a cool system. I made a house last year for the first time w/ my husband. We stuffed it full of fireworks before we added the roof & then blew it up on NYE. Good times, I think it is going to be a tradition!
ReplyDelete